

Documentation Index
Fetch the complete documentation index at: https://docs-dev.tessact.ai/llms.txt
Use this file to discover all available pages before exploring further.
Overview
The Users directory is the main admin surface for the user lifecycle. It combines search, filters, bulk actions, row-level actions, and a user details sheet so admins can manage access without jumping between multiple settings pages.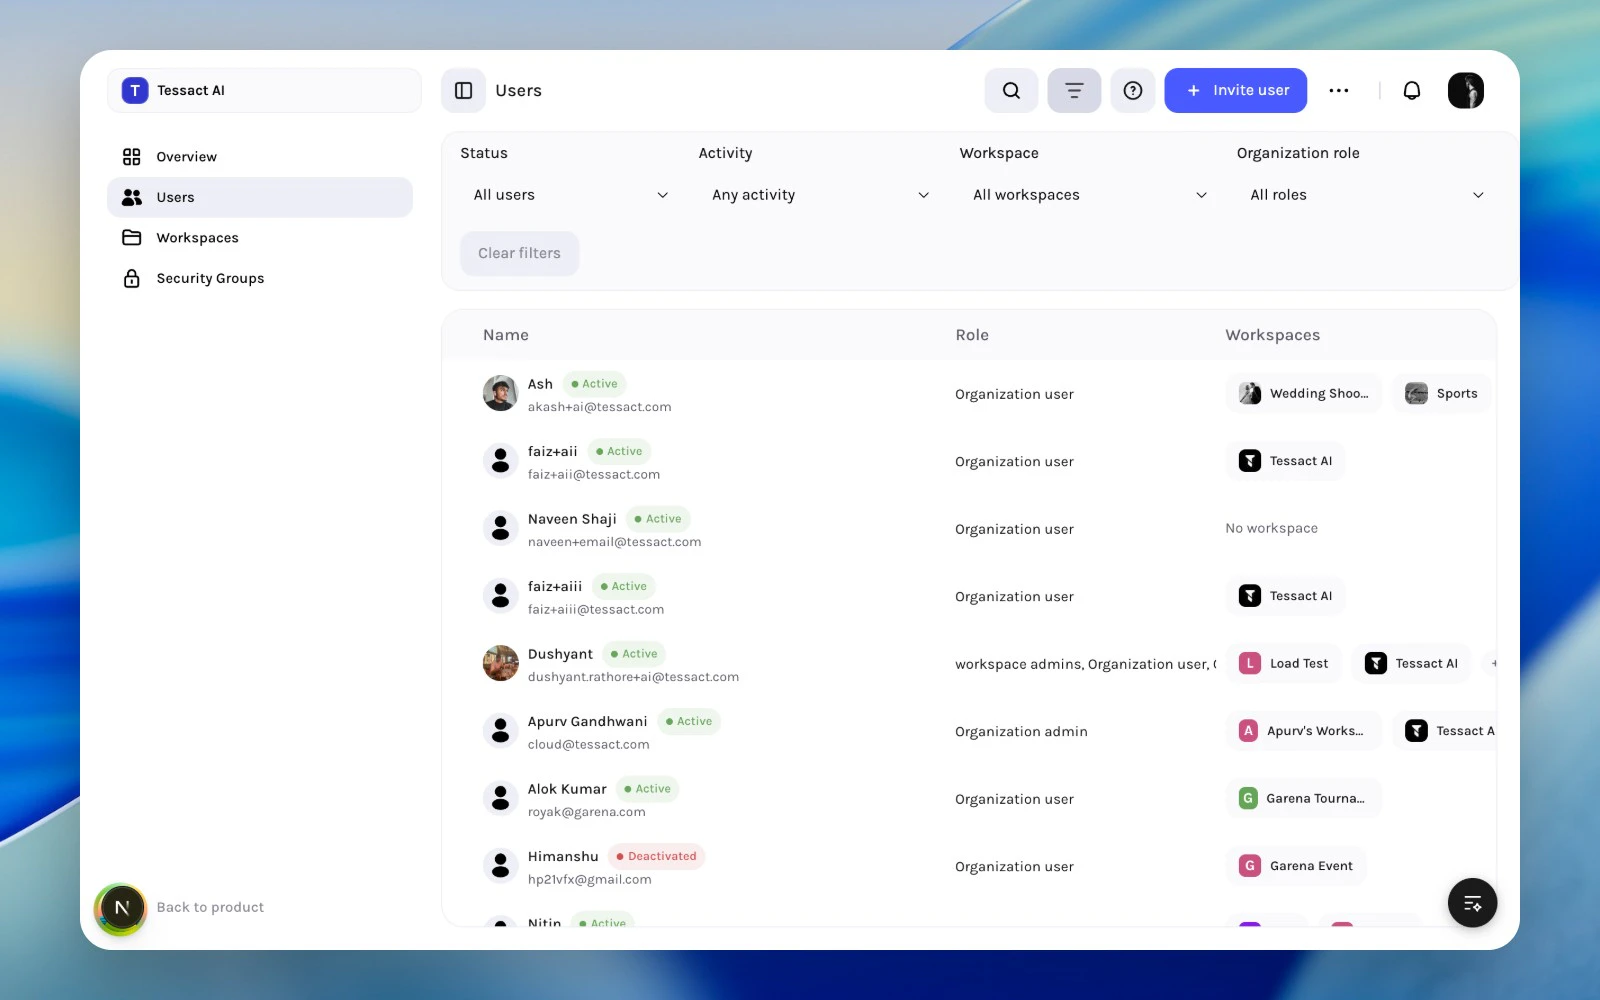
Guide: Invite A User
Use Invite user from the action bar to add someone to the organization. The invite flow captures:- first name
- last name
- display name
- organization role
Open the invite flow from Users
Go to Admin → Users and use Invite user from the top action bar. This keeps onboarding anchored in the same directory where you will later review activity, role, and workspace access.
Fill identity details and choose an organization role
Add the person’s email, first name, last name, display name, and initial organization role.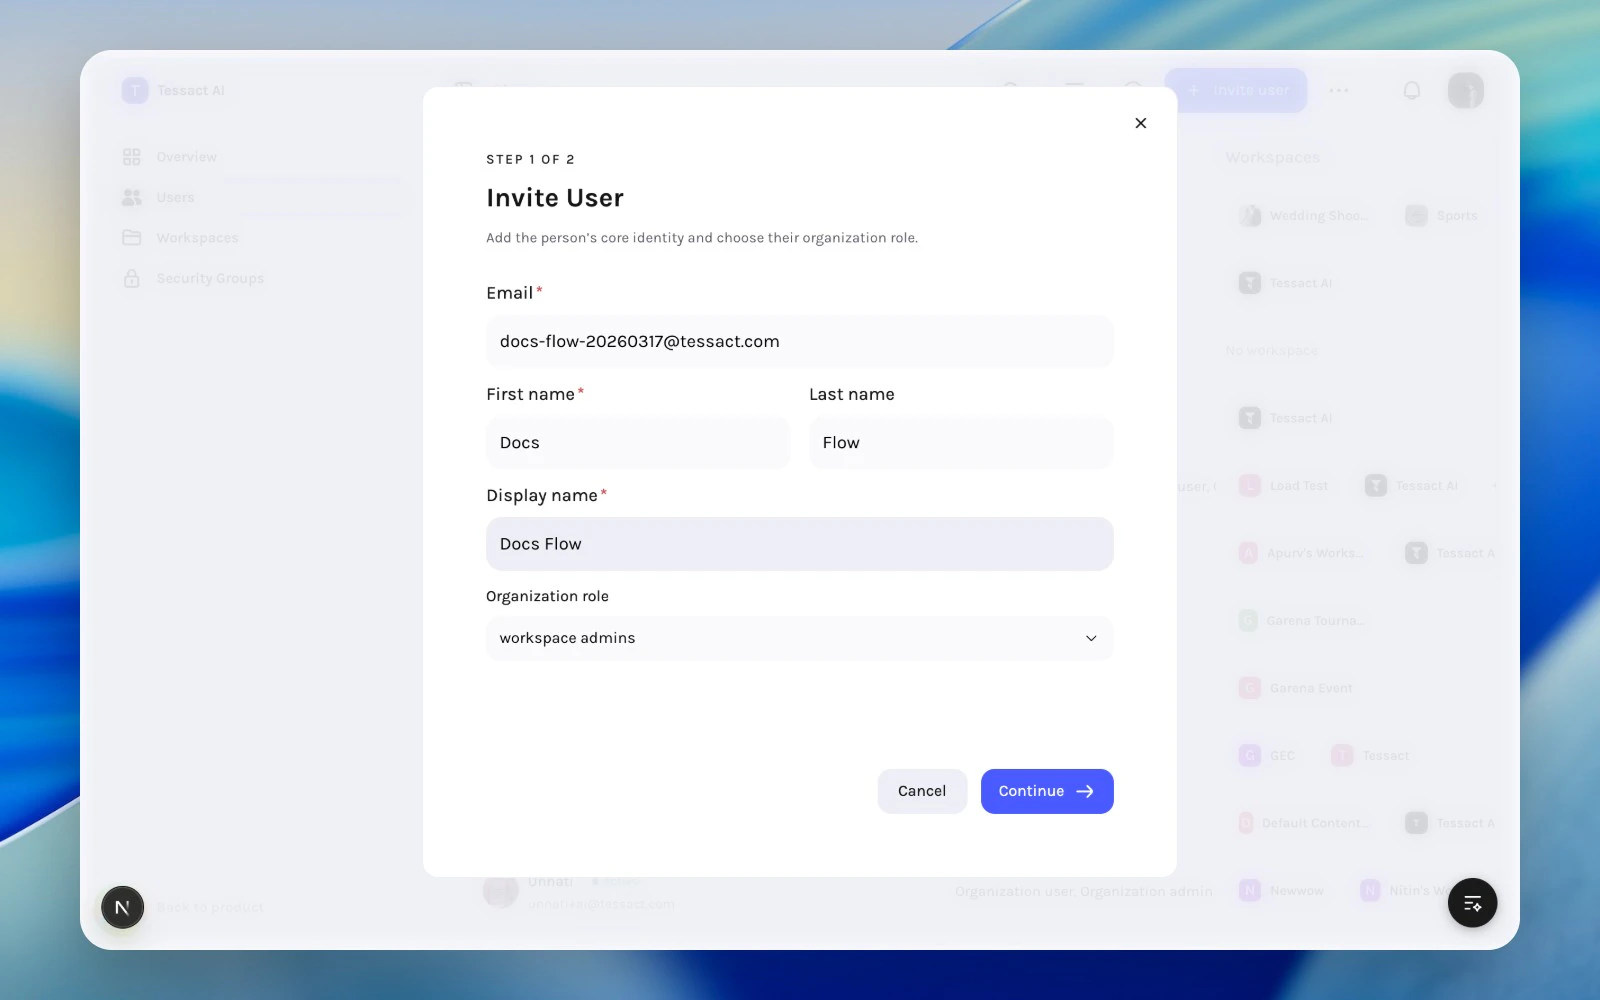
Continue to workspace access
Use the second step only if the person should land in one or more workspaces immediately. Choose the target workspaces and the shared workspace role for this invite.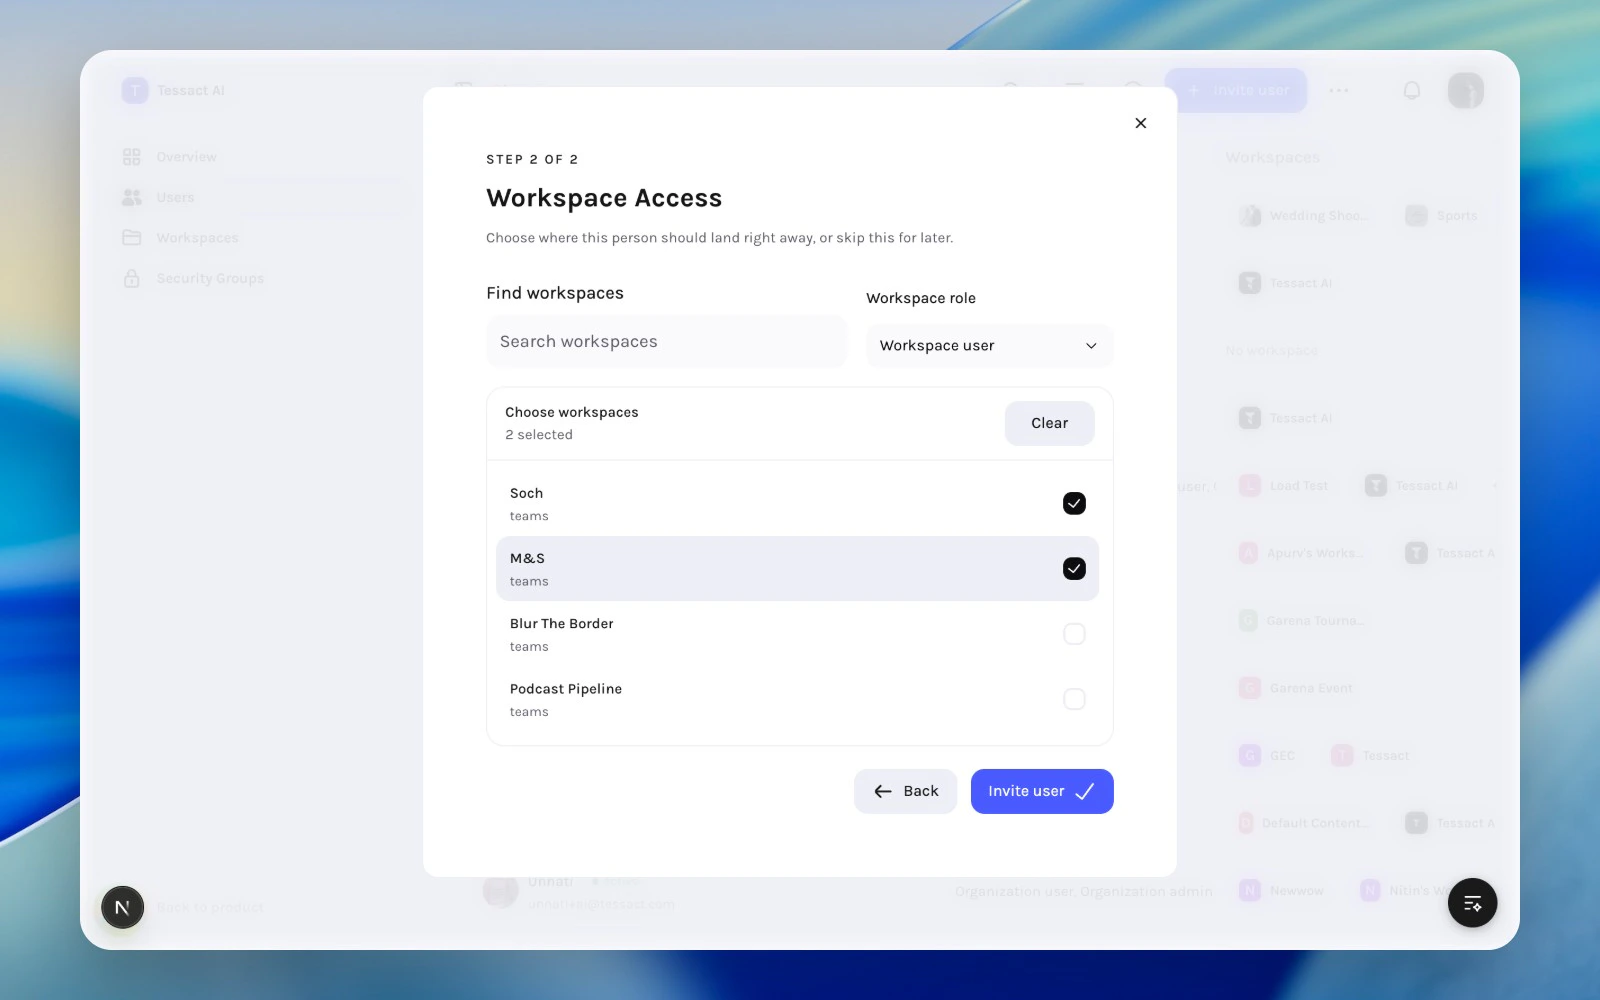
Review Existing Users
The directory is organized around four high-signal columns:| Column | What it shows |
|---|---|
| Name | Identity and email |
| Role | Current organization role |
| Workspaces | Where the user already has access |
| Last active | Whether the account is still being used |
Use Filters For Real Reviews
The Filter users control opens the user filter bar. Current filters include:- Status: all, active, deactivated, no workspace
- Activity: any activity, active in 7 days, active in 30 days, inactive 30+ days, never logged in
- Workspace
- Organization role
- users who never logged in
- users with no workspace access
- inactive users in a specific workspace
- everyone holding a specific organization role
Activate Or Deactivate Users
Tessact supports status changes from both row actions and bulk actions.- Use Deactivate user when a person should temporarily or permanently lose access.
- Use Activate user when returning access to an existing account.
Inspect A User In Detail
Selecting a row opens a details sheet. Use it when the table summary is not enough and you need to verify a specific person’s profile or access context before changing anything. This is especially useful when:- a user appears in several workspaces
- role assignment is unclear
- support requests are tied to the wrong display name or identity data
Common Lifecycle Reviews
Use the directory for three recurring admin reviews:Onboarding
- Invite the user with the correct organization role.
- Decide whether workspace access should be added immediately or later.
- Confirm the user appears with the expected role and membership state.
Dormant account cleanup
- Filter by inactive 30+ days or never logged in.
- Check whether those users still need workspace access.
- Remove workspace access or deactivate the account, depending on the case.
Role verification
- Filter by organization role.
- Open edge cases in the details sheet.
- Use Assign role only when admin responsibility actually changed.
Best Practices
- Invite first, then add workspace access only where it is justified.
- Use activity filters before deactivating dormant accounts.
- Prefer deactivation over duplicate-user creation.
- Keep organization roles limited to the people who truly need them.
- Review users with no workspace regularly so org seats are not wasted on unused accounts.
Next Steps
Membership operations
Manage workspace access cleanly from the users directory.
Admin bulk actions
Speed up org-wide user maintenance with selection-based actions.